Showing posts with label tutorial. Show all posts

Sunday, June 10, 2012

DIY Maxi Dress


Ideally this DIY project should have taken me thirty minutes according to the tutorial I followed.  
Which if I would've followed it correctly, it probably would have. 

After I made her dress, which should turn out all cute looking like this: 

30 minute maxi dress

I tried it on, and looked as though I was wearing a teal colored tent.
Which was quite unflattering on me, 
 so I decided to make it more fitting.  

I had already followed the directions for the neckline and arms.  

Then I took this maxi dress and laid it on the dress I made from the tutorial 
(which pretty much gives you a big rectangle sewn on three sides).
I traced around my maxi dress onto the fabric and sewed up the new sides.   

And then added a strip of green fabric at the bottom.  


Since it is knit fabric you don't have to hem or finish any of the lines. 

Needless to say this "30 minute" project turned into a few hours, but I think it was worth it.
I wasted quite a bit of time before I decided to make it a more fitted dress. 
Maybe now that I know what I'm doing I could do it in 30 minutes!


Pin It!

Sunday, May 6, 2012

Easiest DIY skirt


I've been wanting a polka skirt and have not been able to find one so I decided to make one myself.  First I attempted a skirt with a zipper.  It looked pretty good but would not fit past my thighs.  Clearly I had some measuring issues.  

So I made this one and it is probably the easiest skirt you could make.  

All you need is fabric, elastic and a sewing machine. 


First measure your elastic.  I cut mine too close to my actual waist size and I wish it was tighter, so next time I'd make the elastic smaller than my waist size.    


Measure your material.  I didn't do any real measuring here.  I just held up the material and made sure that the width fit around my waist (with a little extra to sew).  And then the length was long enough with a little extra to hem.  


Fold your fabric in half and sew the one side of your skirt together.  This will be the back of the skirt. 


Then take the top of your skirt and do a very loose stitch.  I put my sewing machine on the highest stitch size.  I'm sure you could do this part by hand to, just sewing wide stitches.  


Take one end of the thread and pull so that your skirt ruffles.  
My thread broke part way, so I just sewed what was left and pulled again.  
This part doesn't have to be perfect because you are sewing over it and then pulling out any extra thread later.  


Sew your elastic band together.  I went back and forth a few times to make sure it was sturdy. 

Line the top of your elastic up to the top of your skirt.  
 The elastic will flip up when you're done. 

Now you have to move your gathers/ruffles around so that your skirt is even.  


Pin your elastic and then sew at the top.  


I had some places where my loose stitch was sticking out some so I had to cut it off in some places.  This stitch doesn't matter any more since you now have the elastic sewed on. 


Finally, iron and hem your skirt. 


And that's it!  


Hope you all had a great weekend!

Pin It!

Sunday, February 19, 2012

a new blazer and a new word


 A friend of mine gave me this white blazer a few weeks ago because she didn't want it anymore.  
Which means a new favorite item for me! 

This weekend Chris and I worked together on a project.  
And we learned a new word: cornice. 
I would've previously referred to them as boxes with fabric above your window.  
The project didn't start out too well.  
After cutting a few pieces of wood, Chris sawed through the cord of his table saw.
Sawed the cord right in half.   
Luckily after another trip to home depot he fixed it and we could finish our project.  

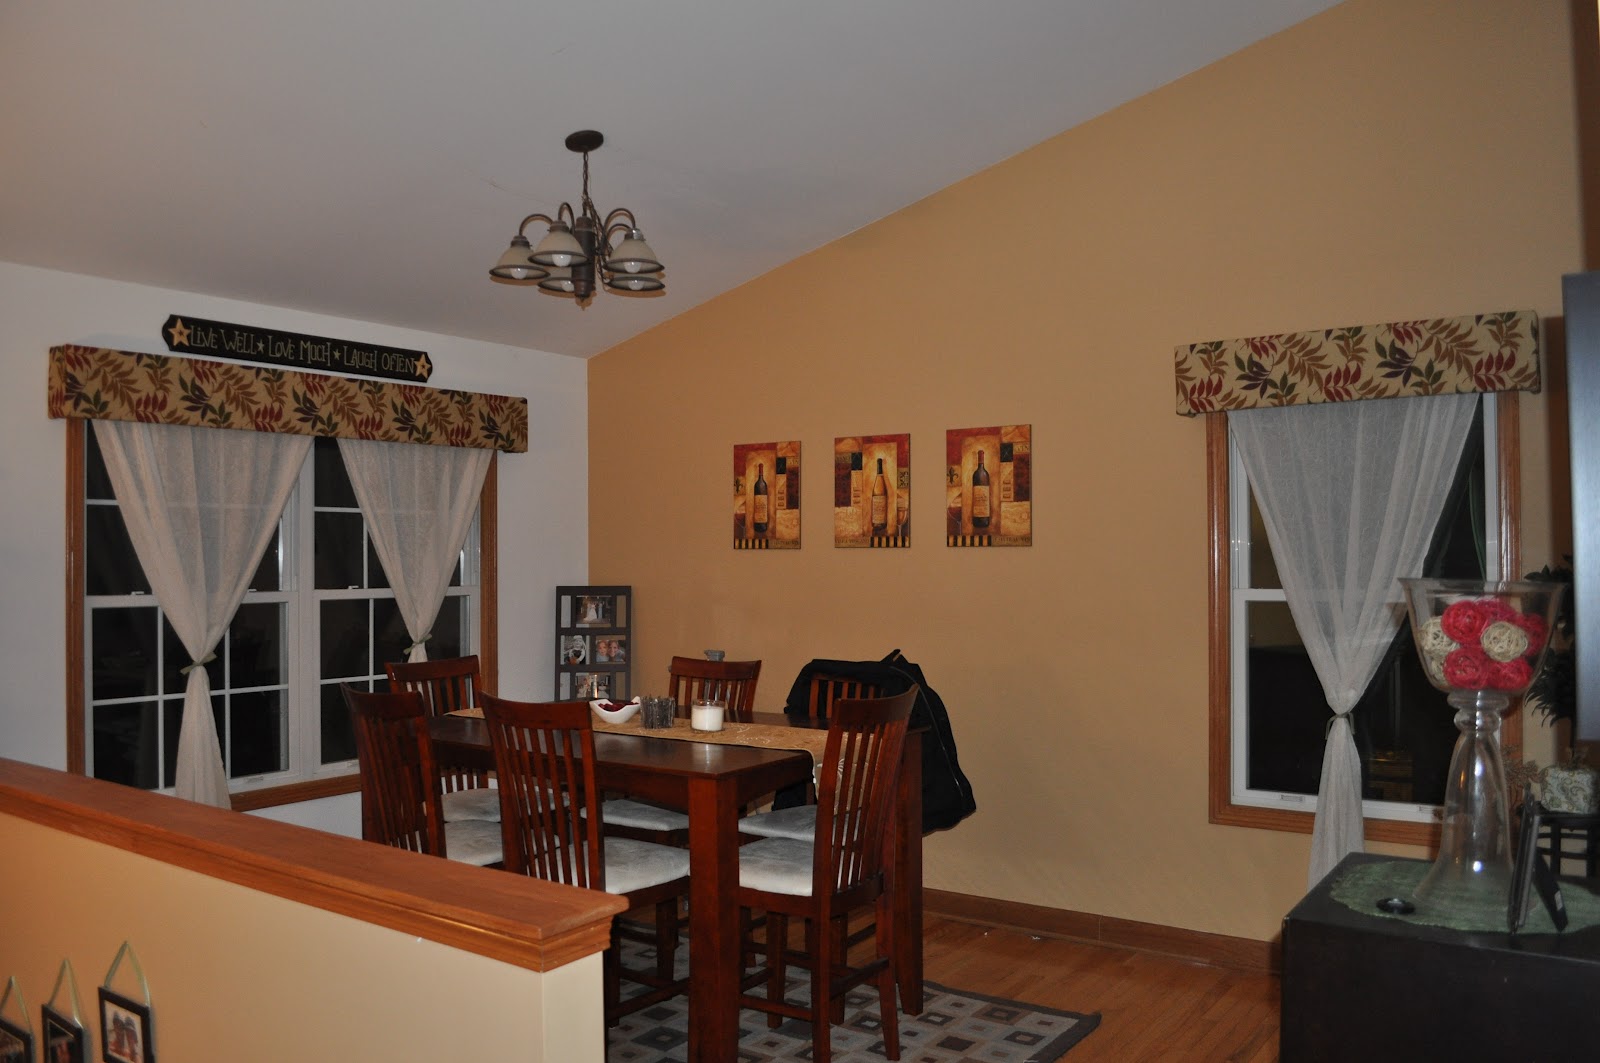
Here's a before of our windows: 

Both had the green curtains on them: 

Rather than writing out the directions, you can just look here for more information. 

You pretty much measure your wood (a front piece, and two sides). 
Wrap it with batting and fabric, and staple gun the back. 
Then put on brackets like this: 
 and put them on your wall.  

The most time consuming part was actually putting them into the wall because you have to use a screwdriver, since the drill won't fit in between. 

Here's how they looked after: 


I love how they turned out.  
Chris and I were pretty proud of ourselves too. 
Chris thinks that we can know build ourselves our own house. 

Pin It!

Sunday, February 12, 2012

DIY Heart Sweater


Have you seen this sweater? 
Well it cost $88 from J.Crew.  
I'm pretty sure I've never spent $88 dollars on an item of clothing before, and would definitely not spend that much on a sweater like this.  
I spent a few weeks searching online for a knock off version because I really liked it, but no luck.  


Not sure why I didn't think about making one sooner!  I found a tutorial on pinterest about painting a heart on a sweater but I didn't want it to be shiny like the one I saw.  
I decided to sew a heart on and it couldn't have been easier or cheaper! 


I found this grey sweater for $7 and a black piece of felt for $0.50.  
I cut a heart out of paper first and then out of the black felt.  
Then I pinned the felt onto the sweater. 
(I tried it on first to make sure that is where I wanted it.) 


I used my sewing machine to sew it on. 
That is it! 
So happy to have spent less than $8 rather than $88!


Pin It!

Sunday, January 29, 2012

One thing at a time

 Shirt: JCPenney      Leggings & Boots: Kohls    Scarf:  handmade

I've realized lately that I can't just do one thing at a time.  If I am watching a movie, then I am usually making a craft or on my computer.  If I am sewing or working on a project, I'll have my laptop in the room and watch a show too.  I am working on trying to do one thing at a time and enjoy it.  This weekend Chris and I watched a movie and I just watched it - without doing anything else.  It was really nice.  And I made two projects, without doing anything else.  I enjoyed the quiet time and felt like it was more relaxing.  I'm sure I'll still multitask often, but I want to work on enjoying and committing to doing one thing at a time.  

Here's the first thing I made this weekend: 
Sorry for the poor quality picture, but it is a lace/silk scarf.  
I''m excited to wear it this week and post the link where I found the tutorial. 

I have a few baby showers coming up and wanted to start working on some gifts.  I've seen similar projects online but didn't find one I like with a tutorial - so I did my best to make my own! 

Plush Lion


Start by cutting out two circles.  I used this really soft and fuzzy fabric.  (I traced one of my trivets for a good sized circle.)

On the back of one of the circles, pin where you want your nose to go. (I used felt for the nose). Then draw where you want the mouth to be.


I did the mouth by hand.  I'm sure it would look better if you used your sewing machine, but I was too afraid I wouldn't be able to make the shape right.

Then sew on your nose. (I used the machine for this.)

And add buttons for the eyes.

I used all different kinds of ribbons that I had and cut them in strips.  Then folded them in half and pinned them to the front of your other circle.

I wish I would've made my strips shorter.  They stick out a little too far, I think. Next time!

 Lay your other piece face down and pin in place.

Once I started sewing these together, the pins that were on the inside holding the ribbon kept getting in the way.  I ended up moving them to the outside.


Sew all the way around your piece, leaving a small opening so you can flip it through.

Turn your lion inside out.


Then fill it up with stuffing/filling and sew shut.

And you have a little plush lion!  
I think I'll hang it on the outside of one of my baby shower gifts.  

Hope you had a great weekend - I am wishing tomorrow was not Monday!

Linking up with: 
Pin It!

Sunday, January 15, 2012

My first tutorial - Bow Bag

Last weekend I made this bow pillow.  I followed a great tutorial online.  I really wanted to make a little make up bag with a bow on it, just like the pillow.  I changed a lot of the sizes to the bow, but used the same directions.  I made a few of them and thought I'd try giving my first sewing tutorial! 


Here are the materials you will need:
Choose two color fabrics.  I picked red for my outer pieces and brown for the inside.
Medium weight interfacing
7 inch zipper
Thread and sewing machine

Cut your fabric:
Outer fabric:
2 pieces 8 in. x 5 in.
4 pieces 11 in. x 3 in.
2 pieces 4 in. x 2 in.
2 pieces 3 in. x 2 in.

Inner fabric:
2 pieces 8 in. x 5 in.

Interfacing:
2 pieces 8 in. x 5 in.


 Make your bow: 
Take two of the 11 in. x 3 in. pieces and the 2 x 4 pieces.  You will do the same thing to both of them.  Sew around all 4 edges, leaving about an inch open.
(Because my fabric is a solid color it doesn't matter what why the fabric is facing.  If you use a printed fabric for your outer pieces, you need to make sure to be facing the outside of the fabrics facing each other when sewing the bow pieces.)


Turn your pieces inside out through the holes that you left open.

(If you used a printed fabric, the print side should now be facing out.) 

Iron the pieces flat.


Now take your other two 11 in. x 3 in. pieces.

Sew only the long sides together.


Then turn this piece inside out (or outside in - whatever you want to call it!  Either way the the fabric side that you want to see should now be facing out.)

Press flat with iron.
You should now have all three pieces to make your bow: 


Take your two pieces that were sewn on all edges and fold them in half.  Sew down one side of both of them.


Flip these pieces around, so that the sewn part in now on the inside.  You now have two loops.


Slide your big loop through your little loop to make your bow.

Now take that other long strip and slide it through the back of your bow.  Pull it through so your bow is in the middle.  


Here's the front view of your bow.


Make your bag
Put your bow on one of the red 8 in. x 5 in. pieces.
Pin it in place and just sew the edges.
Cut off any extra length hanging over.
Get your inner pieces ready.  
Iron on the interfacing to the back side of both pieces. (Read the directions on the interfacing.) 


Get your zipper ready.  Use your two 3 in. by 2 in. pieces.  Fold two of the edges in and press down with iron.  It should look like this: 

 Fold it in half again and sew this to both ends of your zipper.  This way there won't be any holes in your bag. After you sew the little pieces on, cut off the extra on both sides.  It should look like this:


Now stack your pieces so you can start sewing your bag together.
Put your outer piece down first. (face up if not solid)
Then your zipper, face down.
Then put your inner piece, face down.


I've messed this part up before, and put my pieces facing the wrong way.  
After you pin it some of it together, just check to make sure when you flip it, your pieces with both be facing outward.  

Sew your zipper to your fabric.


Flip it around so you have one side of your zipper sewn.


Now sew the other side of your zipper.

Stack your pieces like this:

Other piece of inner fabric facing up.
Zipper piece with inner fabric side facing down.


Finally put your bow piece, facing down.

Sew all the way on the left side to sew the other side of the zipper.

Now you should be able to see how your bag will go together.  You will be sewing all the way around on the inner fabric.  Straighten your pieces so there are no bunches in your bag.  Pin all the way around. 

Make sure to unzip your zipper half way.  If you don't you will not be able to turn in right side out.  I forgot to do this once and had to take out some of the stitching to fix it!


Sew around all three edges.  Cut off any extra fabric or thread and flip your bag right side out through your zipper hole.

You are finished!!


I hope I gave clear directions! Let me know if you have any questions.

Don't want to make one yourself?
I've added some of them to my etsy shop: K.Jane


Pin It!